Color Management for 3DCG
Autodesk Maya 2017
These steps will help you to achieve consistent color management in your 3DCG workflow.
Software Settings
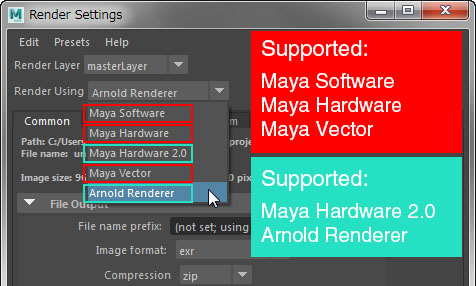
Here, we show you how to change color management settings using Autodesk Maya 2017. Color management is supported by Maya hardware 2.0 and Arnold Renderer. For external renders such as V-ray, verification is required separately.
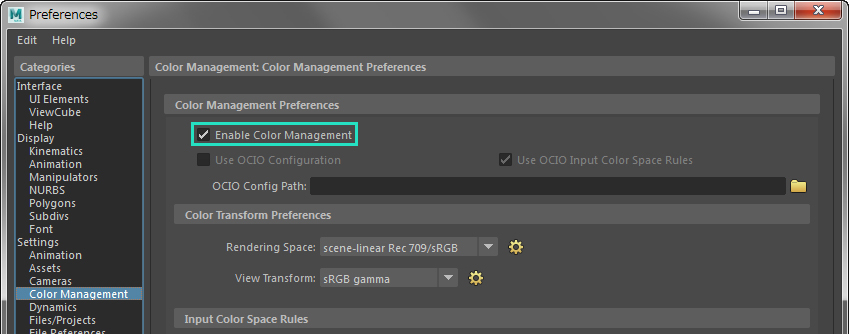
Step 1
Under Settings > Preferences, open Color Management and check the box for Enable Color Management. When creating a new scene, this is automatically turned on.
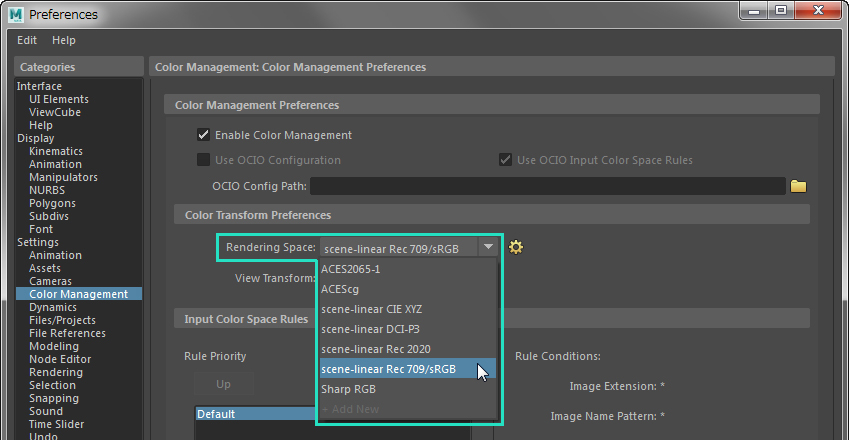
Step 2
For Rendering Space, select scene-linear Rec 709/sRGB.
It's important to choose the rendering space which you wil use for the final output. If you change these settings in the middle of the process, the colors can change drastically.
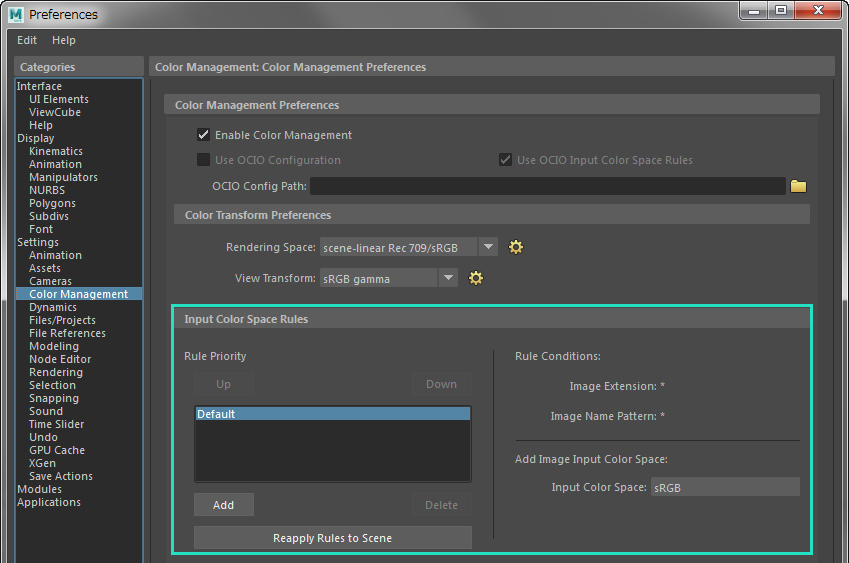
Step 3
For View Transform, select the correct color space for your project. This will ensure that the correct colors will display.
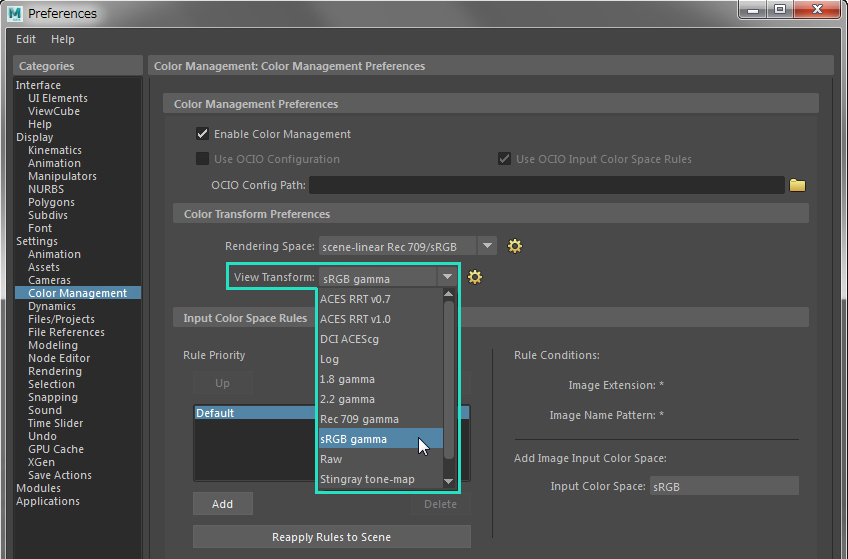
Step 4
Under Input Color Space Rules, select Default. This will convert sRGB images to the rendering space you selected. For images produced in other color spaces, you need to add a rule.
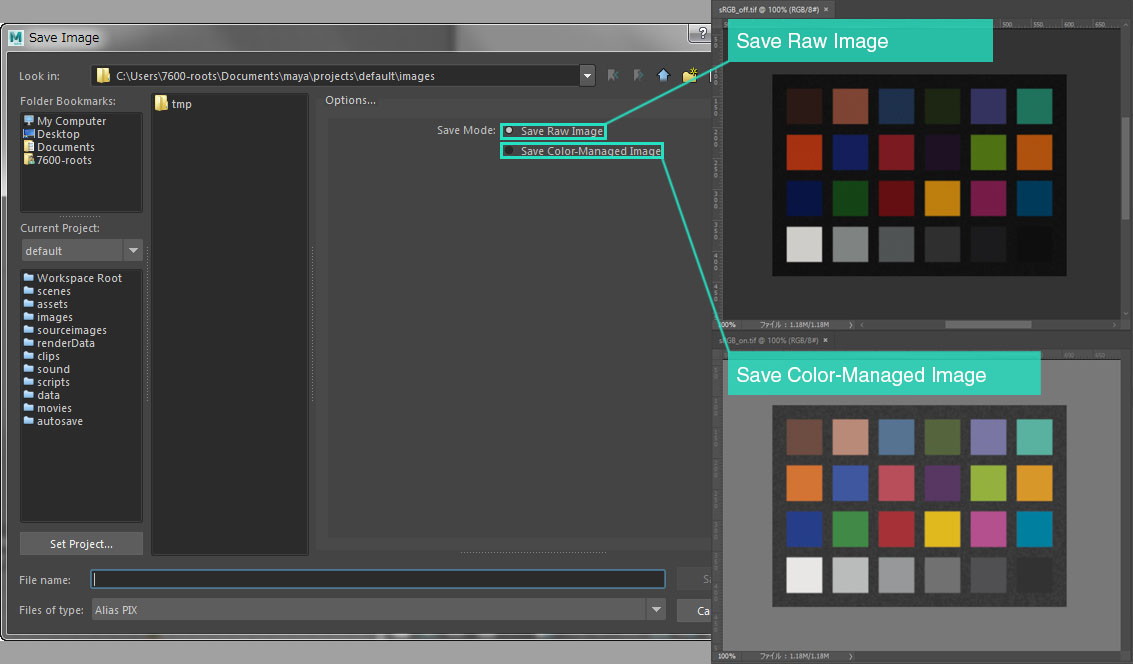
Step 5
When saving images, convert to the appropriate color space. You can select either Save Color-Managed Image to convert and save or Save Raw Image to keep the rendering space settings (linear).